


1. Connection of Pipe Fittings
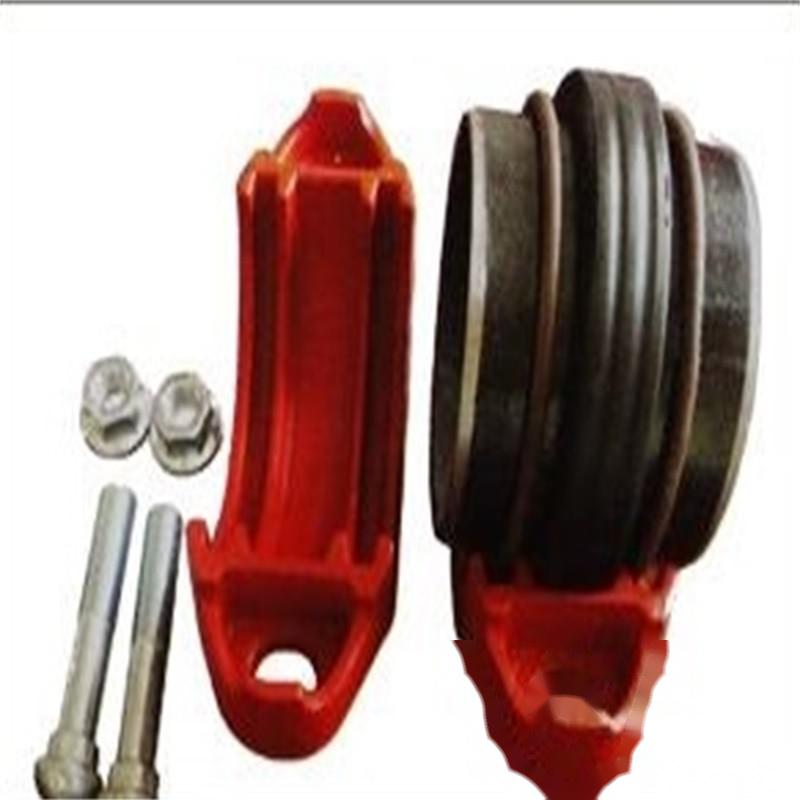
1. Clamp Installation
(1) Installing the Sealing Ring: Place the sealing ring onto one end of the pipe, then align the other pipe end with this end. Move the sealing ring to the sealing surface of the two pipe ends, ensuring that the sealing ring does not extend into the grooves of both pipes.
(2) Installing the Joint: First, loosen the screws at both ends of the joint and separate it into two parts. Sequentially place two outer shells onto the sealing ring, insert the bolts, and alternately tighten the nuts, ensuring that both ends of the outer shell enter the grooves until fully tightened.
2. Installation of Mechanical Tees and Mechanical Crosses
First, remove one bolt from the outer shell, loosen the other nut until the bolt tip is exposed, rotate the lower shell about 90 degrees away from the upper shell, align the outlet portion of the upper shell with the opening of the pipe and ensure it is in line with the hole. Then, rotate the lower shell along the pipe end (if it is a mechanical cross, the method for the lower shell is the same as that for the upper shell) to bring the two parts together.
3. Installation of Flange Plates
Installing the Flange Plates: First, loosen the screws on both sides to separate the two flange plates. Insert the annular key portions of both flange plates into the grooves at the ends of the slotted pipes, then insert and tighten the screws on both sides, adjusting the gaps on both sides to be similar.
Installing the Sealing Ring: Place the sealing ring with the “C” shaped opening facing away from the flange, and push it into the inner groove of the flange along the pipe end direction.